
You have spent weeks planning your office move. The movers are booked, the new lease is signed, and you are ready to say goodbye to your old workspace. But then, the handover inspection happens. The landlord’s facility manager walks in, looks at the ceiling, points to a few seemingly minor issues—a missing sprinkler head cover, a floor box that hasn’t been terminated correctly, and a patch of wall that isn’t the “approved” shade of white.
The verdict? Failed handover.
Suddenly, you are facing a nightmare scenario: delayed deposit refunds, “urgent rectification” surcharges that are 30% higher than market rate, and the dreaded double rent penalty. To put a real number on it: For a typical 2,000 sqft CBD office, this penalty can easily cost you an extra $20,000+ just for a few days of delay. In Singapore’s strict commercial leasing environment, this happens more often than you think. The difference between a smooth exit and a financial disaster often comes down to one simple tool: The Reinstatement Checklist. As a BCA-certified contractor who has managed over 500 handovers in Singapore, I’m going to show you exactly why this checklist is your financial safety net and how to use one effectively.
What Is a Reinstatement Checklist?
A reinstatement checklist is a comprehensive, structured document that outlines every single task required to return your commercial unit to its “original condition.” Think of it as the exam paper your landlord will use to grade you. It doesn’t just list “demolish partitions.” It breaks down the granular details that tenants often miss, such as:
- Removing hidden data cables above the false ceiling.
- Ensuring the air-conditioning (MVAC) grilles are aligned with the building’s original grid.
- Verifying that all electrical points are not just removed, but safely terminated at the Distribution Board (DB).
Landlords, building managers, and office reinstatement contractor Singapore professionals rely on this document to ensure nothing is left to chance. It bridges the gap between what you think needs to be done and what the tenancy agreement actually requires.
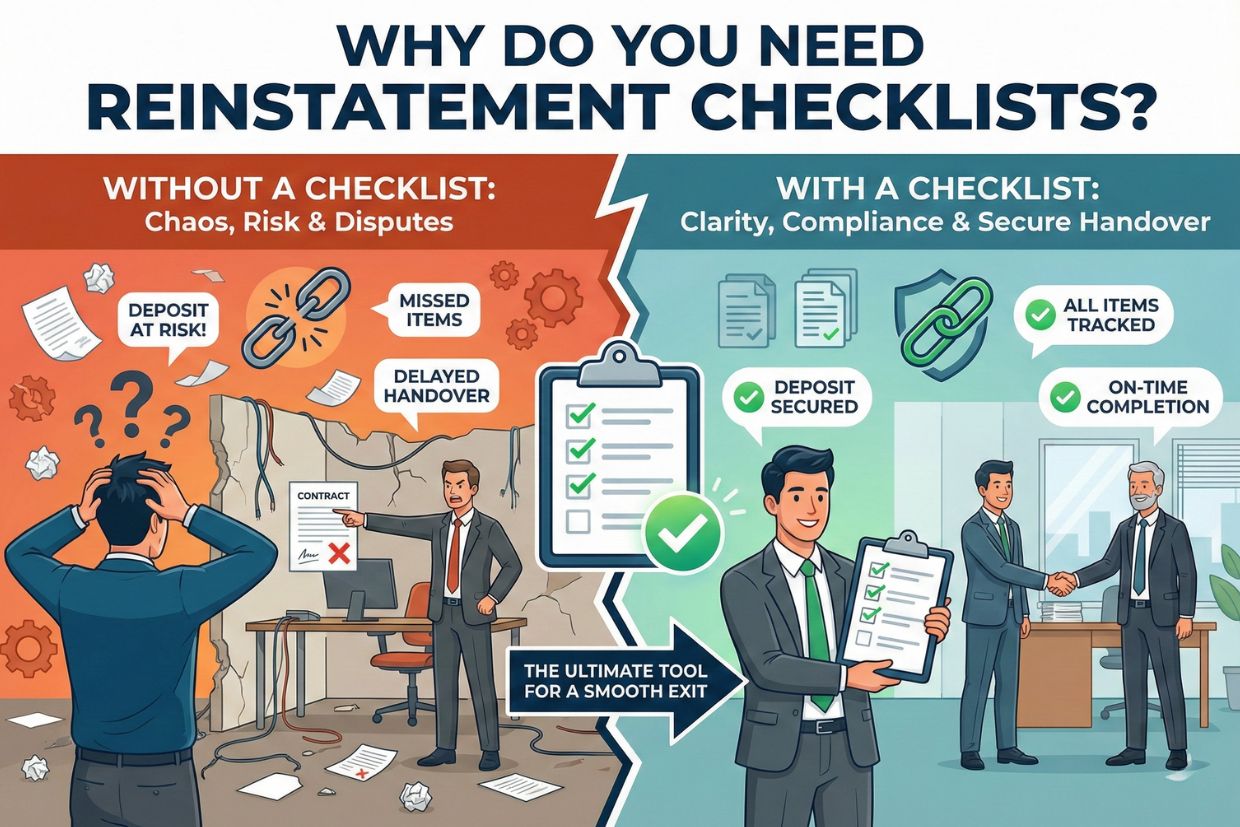
Why Reinstatement Checklists Are Essential (Real Benefits)

You might think, “My contractor knows what to do, why do I need a checklist?” relying on memory or verbal instructions is the fastest way to lose money. Here is why this document is non-negotiable.
Prevent Costly Penalties & Last-Minute Rectifications
If you miss your handover date by even one day, most Singapore tenancy agreements trigger a “holding over” clause. This typically charges you double the gross rent for every day you overstay. A checklist ensures you finish on time, avoiding these punitive fees.
Keep the Project Organised & On Schedule
Reinstatement isn’t just demolition. It’s a sequenced operation. You can’t paint the walls before you patch the holes from the partitions. A checklist forces a logical order:
- Week 1: Disconnection & Demolition.
- Week 2: M&E Rectification.
- Week 3: Painting & Cleaning.
Ensure Compliance With Tenancy Agreement & Building Rules
Every building has its own quirks. Some require you to chemical wash the aircon fan coil units (FCUs); others demand specific brands of fire-rated partition board for repairs. A checklist tailored to your specific building (e.g., Suntec City vs. a flatted factory in Ubi) ensures you don’t violate house rules.
Avoid Deposit Deductions & Contractor Disputes
“I thought you included disposal in the quote!” Disputes like this arise when the scope isn’t documented. A checklist acts as a defined scope of work. If it’s on the list, the contractor must do it. This protects you from “variation orders” (extra charges) midway through the project.
What Should a Good Reinstatement Checklist Include?
A generic “to-do list” won’t cut it. Your checklist needs to cover these five critical categories.
1. Demolition & Dismantling Tasks
- Partitions: Removal of all drywall, glass, and manager room partitions.
- Built-ins: Dismantling of pantry cabinets, reception desks, and feature walls.
- Flooring: Hacking away tiles or peeling off glued-down carpet. Crucial: You must also remove the glue residue (grinding the floor) to leave a smooth concrete screed.
2. M&E and Safety Items
- Electrical: Removal of all non-standard power points and lighting.
- Cabling: Warning: Leaving “ghost cables” (unused data wires) in the ceiling is a common failure point. They must be removed.
- Fire Safety (SCDF): Relocating sprinkler heads and smoke detectors back to their original positions.
3. Wall, Floor, and Ceiling Restoration
- Patching: Filling up bolt holes from wall-mounted TVs or shelves.
- Painting: Applying the specific shade of white (usually “Sail White” or similar) required by the landlord.
- Ceiling Grid: Replacing any warped or discoloured ceiling boards.
4. Cleaning, Waste Disposal & Site Clearance
- Debris Removal: All waste must be sent to NEA-licensed disposal grounds (like the Tuas Marine Transfer Station).
- Chemical Cleaning: Often required for carpets (if staying) or bare floors.
5. Final Inspection Requirements
- Joint Inspection: A slot for the landlord’s signature.
- Handover Keys: Returning the specific number of key sets and access cards.
Pro Tip: When hiring an office reinstatement contractor Singapore, ask to see their standard checklist during the quotation phase. It shows they are organised and experienced.
Reinstatement Works Checklist (Singapore)
| Category | Checklist Items |
| 1. General Requirements |
|
| 2. Demolition & Removal |
|
| 3. Electrical & Lighting |
|
| 4. Aircon & Mechanical Ventilation |
|
| 5. Plumbing & Sanitary |
|
| 6. Flooring |
|
| 7. Walls & Paintwork |
|
| 8. Ceilings |
|
| 9. Fire Safety System |
|
| 10. Glass & Windows |
|
| 11. Carpentry |
|
| 12. Signage & Branding |
|
| 13. Cleaning & Final Touch-Up |
|
| 14. Handover Preparation |
|
How Reinstatement Checklists Improve Work Efficiency
Time is money. In 2025, manpower costs in Singapore have risen, and wasting time on site destroys margins. A checklist helps contractors schedule manpower accurately. For example, we know exactly when to book the “Hot Work Permit” (for cutting metal) because the checklist says “Day 2: Dismantle Metal Racking.” It also minimizes miscommunication. If the checklist says “Remove Blinds,” the workers won’t accidentally throw away the landlord’s original blinds that were supposed to stay. This prevents duplicate work and wasted man-hours, ensuring the project hits that tight 2-week deadline.
Who Should Use Reinstatement Checklists? (Quick Comparison)
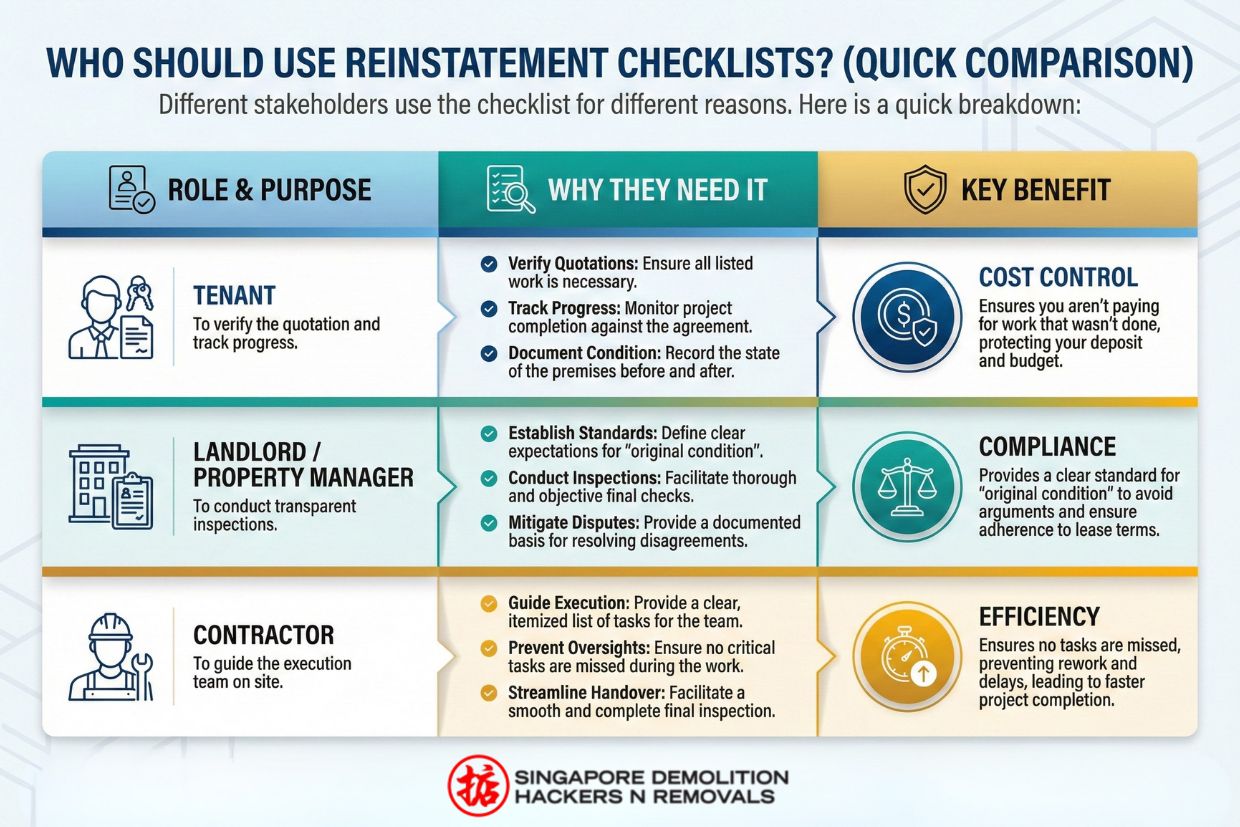
Different stakeholders use the checklist for different reasons. Here is a quick breakdown:
| Role | Why They Need It | Key Benefit |
| Tenant | To verify the quotation and track progress. | Cost Control: Ensures you aren’t paying for work that wasn’t done. |
| Landlord / Property Manager | To conduct transparent inspections. | Compliance: Provides a clear standard for “original condition” to avoid arguments. |
| Contractor | To guide the execution team on site. | Efficiency: Ensures no tasks are missed, preventing rework and delays. |
Step-by-Step Guide to Using a Reinstatement Checklist
Step 1 – Compare with Original Unit Condition
Dig out the “Handover Form” you signed when you first moved in. Look at the photos. Your goal is to reverse-engineer the space to look exactly like those old photos.
Step 2 – Conduct Site Survey With Contractor
Walk the ground with your reinstatement contractor Singapore. Use the checklist to mark off what needs to be done. Example: “Do we need to remove this pantry sink? Yes, mark it down.”
Step 3 – Organise Tasks Into Phases
Don’t try to do everything at once.
- Phase 1: Heavy Hacking & Disposal.
- Phase 2: Technical M&E Works (Electricians & Plumbers).
- Phase 3: Aesthetic Make-Good (Painters).
Step 4 – Review Checklist Before Handover
48 hours before the landlord arrives, do a “mock inspection.” Go through the list yourself. If you find a defect, you still have time to fix it without penalty.
Common Mistakes People Make Without Reinstatement Checklists
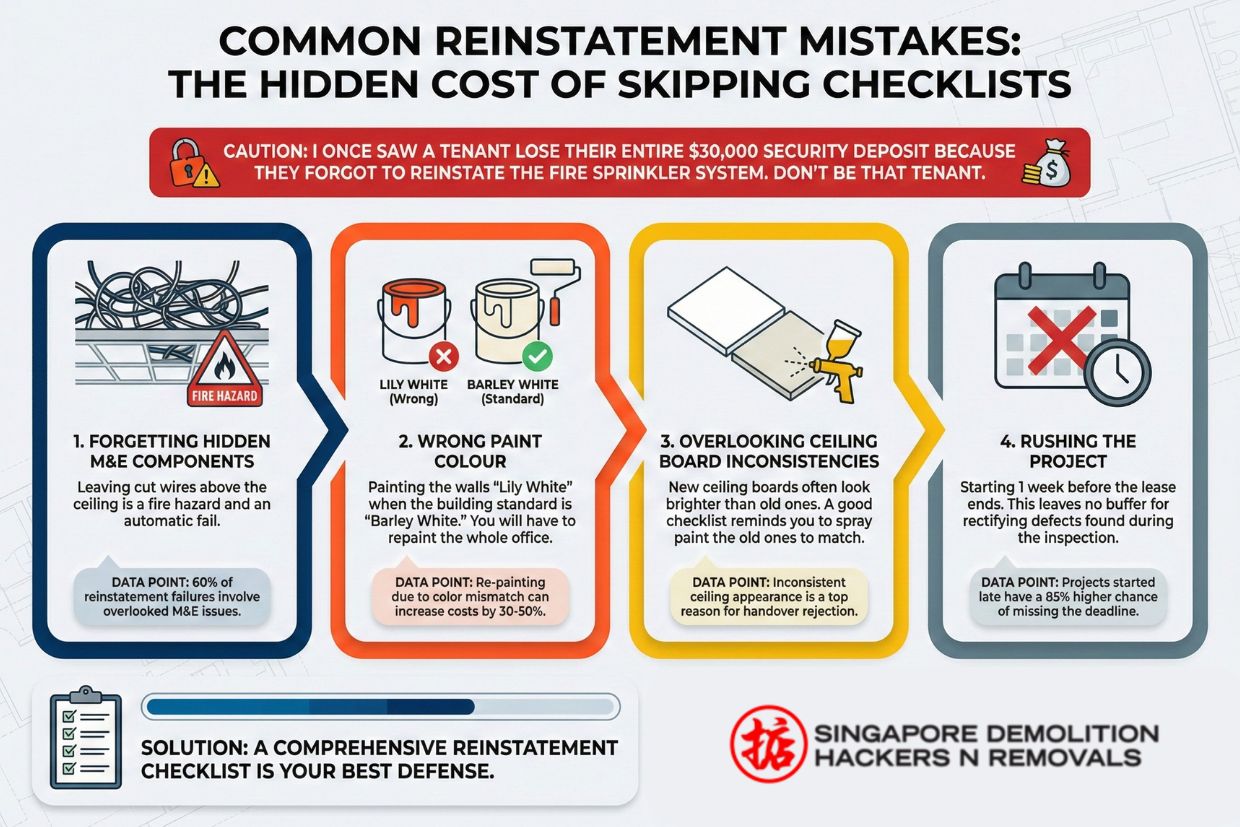
I once saw a tenant lose their entire $30,000 security deposit because they forgot to reinstate the fire sprinkler system. Don’t be that tenant.
- Forgetting Hidden M&E Components: Leaving cut wires above the ceiling is a fire hazard and an automatic fail.
- Wrong Paint Colour: Painting the walls “Lily White” when the building standard is “Barley White.” You will have to repaint the whole office.
- Overlooking Ceiling Board Inconsistencies: New ceiling boards often look brighter than old ones. A good checklist reminds you to spray paint the old ones to match.
- Rushing the Project: Starting 1 week before the lease ends. This leaves no buffer for rectifying defects found during the inspection.
Final Tips from a BCA-Licensed Contractor
Start Early:
Begin the checklist process 4–6 weeks before your lease expires. This gives you time to get quotes and permits.
Watch the Lifts (2025 Regulatory Update):
⚠️ Warning: Under the new BCA ‘Reportable Matters’ rules (Oct 2025), any damage to building lifts during debris removal is now classified as a major compliance incident. Ensure your checklist specifically includes “Install Lift Protection Padding” before any debris removal starts. If your contractor scratches the lift, you could face immediate work stoppage and fines.
Use Licensed Pros:
Always use a licensed electrical worker (LEW) and fire safety specialists. Your handyman cannot legally modify the building’s main electrical DB.
Conclusion
Reinstatement is the final chapter of your tenancy, and it should not be a painful one. A well-planned reinstatement checklist is the difference between a stressful, expensive exit and a smooth handover where you get your full deposit back. It ensures you meet every legal obligation, from BCA structural safety to SCDF fire compliance, without wasting money on unnecessary works. Don’t leave your deposit to chance. Start your planning early, document everything, and work with qualified professionals who treat your checklist as seriously as you do.
FAQs About Reinstatement Checklists
FAQ 1: Are reinstatement checklists mandatory in Singapore?
While not legally “mandatory” as a government form, they are practically essential. Most landlords will use their own checklist during the final inspection, so having your own to match theirs is the best way to ensure you pass.
FAQ 2: Who creates the reinstatement checklist, the tenant or the contractor?
Ideally, the tenant creates the initial list based on the lease agreement, but a professional contractor will refine it during the site survey to include technical details (like M&E requirements) that tenants might miss.
FAQ 3: What happens if an item on the checklist is missed?
The landlord will mark it as “incomplete” during the handover. You will likely be given a few days to fix it (if your lease hasn’t expired). If your lease has expired, the landlord may fix it themselves and deduct the cost (plus an administrative fee) from your deposit.
FAQ 4: How do checklists help reduce reinstatement costs?
They prevent “scope creep” and rework. By clearly defining the work upfront, you avoid paying for last-minute emergency repairs or “urgent” labor rates, which can be 1.5x the standard cost.
FAQ 5: Do landlords provide their own reinstatement checklist?
Yes, most major landlords (like CapitaLand or Mapletree) provide a “Handover Guide” or checklist. Always ask for this document 2 months before you leave it is the cheat sheet to passing their inspection.
FAQ 6: Can a checklist work for both office and retail reinstatement?
Yes, but retail checklists are more complex. They often include additional requirements like grease trap removal, exhaust hood dismantling, and frontage glass restoration that standard offices don’t need.
Quick Summary: Why a Reinstatement Checklist Is Essential
| Quick Summary | Key Point |
|---|---|
| Handover Failures Are Common | Minor issues like sprinkler covers, cabling, or paint shade mismatches often cause failed inspections, leading to penalties, delays, and double rent. |
| Reinstatement Checklist Prevents Costly Mistakes | A checklist acts as your roadmap to meeting all tenancy and building requirements, avoiding last-minute surprises. |
| What It Covers | Demolition, M&E rectification, fire safety alignment, patching, painting, cleaning, waste disposal, and final inspection requirements. |
| Real Benefits | Prevents penalties like double rent, keeps the project organised, ensures compliance, and avoids deposit deductions. |
| Critical Checklist Sections | 1. Demolition & dismantling, 2. M&E & fire safety, 3. Wall/floor/ceiling repairs, 4. Cleaning & disposal, 5. Final inspection items. |
| Who Uses It | Tenants (cost control), landlords (compliance), and contractors (execution accuracy). |
| How to Use It | Compare with original condition → survey with contractor → organise into phases → conduct mock inspection before handover. |
| Common Mistakes Without a Checklist | Hidden cable leftovers, wrong paint colour, mismatched ceiling boards, rushed timelines, and missed fire safety reinstatement. |
| Key Expert Tips | Start 4–6 weeks early, protect lifts, use licensed pros for electrical and fire safety works. |
| Bottom Line | A proper reinstatement checklist is the difference between a smooth, penalty-free handover and expensive delays or lost deposits. |